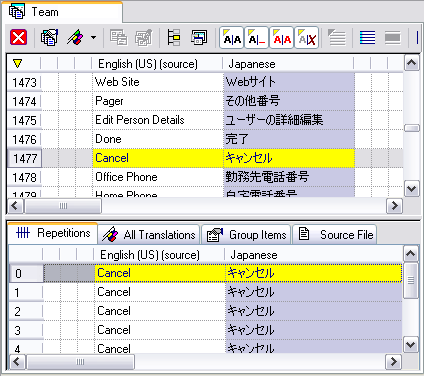
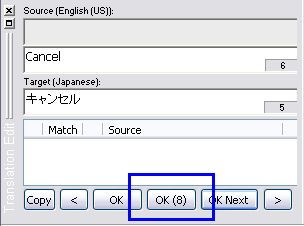
Items that have the exact same source text are referred to as "repetitions." RC-WinTrans automatically translates all repetitions whenever you confirm the translation of one of the items by pressing the OK (_) button in the Translation Edit bar (Figure 2). There are also provisions for translating certain repetitions on their own, or excluding them from being automatically translated along with other repetitions, which will be discussed further on.
|
Figure 1: The Project window with the (primary window of the) Text Table view on top and the Repetitions view below it. The currently selected item has the English source text "Cancel." The Repetitions view lists all translation units with the exact same source text. |
|
Figure 2: The Translation Edit bar displaying the source and target texts of the currently selected translation unit (from Figure 1). The number "8" shown in parentheses on the OK ( 8 ) button indicates that the project contains a total of eight items with this exact source text. |
Repetions are not automatically translated under the following circumstances:
NOTE ON HOTKEYS: RC-WinTrans will (by default) ignore hotkeys (ampersand characters (&)) in the automatic translation of repetitions. For more information on automatic hotkey insertion please see "Repetitions View" in the "Project Window" topic.
A single translation unit can be marked as having a "unique translation" and thereby excluded from being automatically translated along with other repetitions or from being reported by the uniform translation check function. The attribute specifying this is known as the "unique translation“ attribute. For information on how to set attributes and/or state flags for items please refer to the help topic entitled "Setting Item Attributes and State Flags."
Translation units that have been designated as having a unique translation are marked with the Unique Translation symbol ( ) in the Text Table view. A "unique translation" flag can easily be assigned to a translation unit with the Unique Translation button in the Item State toolbar (Figure 3).
|