Figure 1: Menu commands used to create a new translation project with the New Translation Project Assistant.
Before a resource file (a file from a software project) can be translated in RC-WinTrans, it must first be added to an existing translation project. The New Translation Project Assistant guides you through the process of creating a new translation project and adding source files to it so that they can then be translated in RC-WinTrans.
The New Translation Project Assistant is called up via the File | New | Project menu commands (Figure 1). |
|
Figure 1: Menu commands used to create a new translation project with the New Translation Project Assistant. |
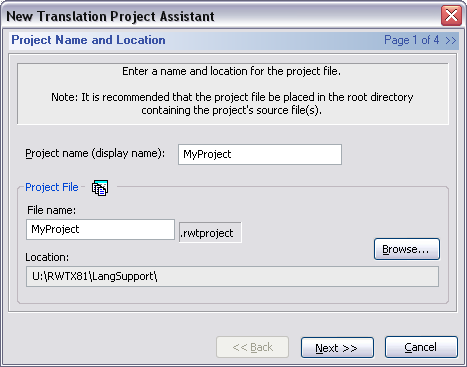
The initial page of the New Translation Project Assistant asks you to designate a name for the new project and select a location for it on your computer. It is recommended that the project file be placed in the same directory as the files to be translated (the files added to the project) or in a root directory. This makes it easier to move the project (including the source and data files) since the project file can maintain a relative path to the project's source file(s).
Confirm your selection and continue on to the next step by pressing the Next button. |
Figure 2: The initial page of the New Translation Project Assistant (Project Name and Location page). |
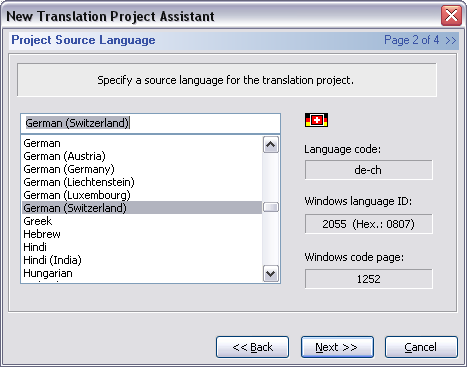
Select the project's source language from the list of languages on the Project Source Language page. This is the source language of the (source) file(s) that have been added to the project. Once you have made your selection click the Next button to continue on to the next step. |
Figure 3: Specification of the new project's source language (Project Source Language page). |
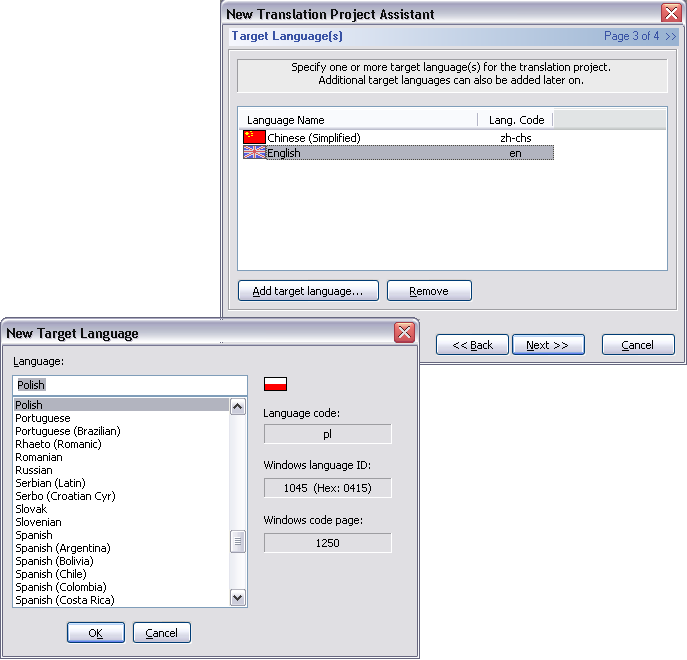
The Target Language(s) page asks you to select one or more target languages for the new project. Click on the Add target language button at the bottom of the page to call up the New Target Language dialog box (Figure 4) and select the language that you want to designate as a target language from the list provided. Press the OK button to close the dialog box and add the language to the list of selected target languages.
Confirm your choice(s) and continue on to the next step by pressing the Next button. |
||||||
Figure 4: Specification of the new project's target language(s) (Target Language(s) page). |
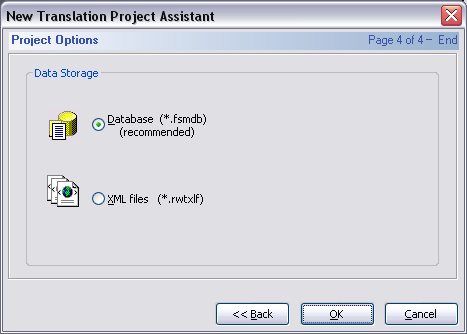
On the Project Options page, select the type of data storage to use to save the project's translation data.
NOTE: The database storage method is recommended.
See also: "Translation Project." |
Figure 5: Data storage options on the Project Options page. |
Upon pressing the OK button on the final page of the Create New Translation Project Assistant (Figure 5), the Assistant will be closed and the new translation project will be created then opened in RC-WinTrans' Project window (Figure 6). |
Figure 6: A newly-created translation project opened in RC-WinTrans' Project window. |
|